
Growing magic mushrooms can be a fruitful and rewarding hobby. This guide will tell you all you need to know from start to finish. The process is simple and really, the hardest part is just the initial preparation then waiting for your harvest to grow from spore to fruit.
 Although psilocybin is still illegal in most states, through the hard work of many researchers and conscious allies of this plant teacher, laws are beginning to change to break the taboo on magic mushrooms.
If you want to grow your own shrooms, we suggest to read this guide thoroughly to get an idea of what you are in for to have your own home-grown supply of shrooms.
You may also choose to skip the prepwork and waiting game and apply for microdosing to gain access to psilocybin for microdosing from trusted suppliers so you won’t have to worry about growing, harvesting, preparation and dosing by yourself.
Trust the Shroom Growing Experts
There are many methods for growing psychedelic mushrooms. For beginners, we recommend following the steps innovated by Robert McPherson, aka “Psylocybe Fanaticus” in 1991. In his shroom growing guide, PF Tek, he made indoor growing cheaper and more reliable for those growing magic mushrooms for the first time.
His method includes adding vermiculite to the substrate to create more spaces for mycelium to grow, thus mimicking a more natural environment.
Reportedly, the PF Tek method to grow your own shrooms is more labour-intensive and may have a lower yield than other methods – but it has a higher success rate and reliability due to its simplicity.
Prepare Your Mushroom Growing Supplies
You will need to gather some materials to grow your own shrooms at home. They are all quite easily available at your local hardware store and pharmacy.
First, have everything you need to ensure your materials and growing areas are as clean and sterile as possible
- Lighter or Propane Torch
- 70% Isopropyl Alchohol, Lysol, or similar
- Air Sanitizer
- Cotton Balls or Tissue
- Latex Gloves
- Surgical Mask (optional)
- Glove Box (optional)
The first phase of growing psychedelic mushrooms involves inoculating substrate in jars or a plastic monotub. For this guide, we recommend the jar method to prevent cross-contamination. You will need the following supplies:
- 12 Wide-mouth Half-Pint Shoulderless Glass Jars with Lids
- Measuring Cup
- Hammer and Small Nail
- Micropore Tape
- Cooking Pot
- Small Towel
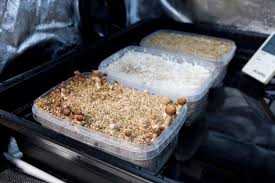
To make your own magic mushroom growing substrate, gather the following ingredients:
- Medium or Fine Vermiculite
- Brown Rice Flour or Brown Rice (use a coffee grinder to powderize the rice)
- Distilled Drinking Water
When your mycelium is ready, you will need to transfer them to a Growing Chamber. These are the materials you will need to make one yourself:
- 50-115 Liter Clear Plastic Storage Box
- Spare Wooden Block
- 1/4 Inch Drill
- Perlite
You will also need these materials to turn your myceleum into “cakes” which will go into your Growing Chamber until they fruit.
- Mixing Bowl and Spoon
- Large Cooking Pot with a Tight Lid
- Small Towel
- Strainer
- Heavy Duty Tin Foil
- Vermiculite
And finally, you will need a psilocybin spore syringe to colonize your first batch of magic mushrooms. You may either purchase one online or make one yourself after your first successful shroom fruiting.
How to Grow Your Own Shrooms From Start to Finish
 Once you’ve gathered all your mushroom growing supplies, you’re ready to dive right into the process shroom growing at home.
Disinfect everything you will use during this entire process. Do this by wiping down all surfaces of jars, lids, mixing bowls, spoons, etc… Wear your latex gloves and even a surgical mask if possible.
- Prepare your Jars and Mushroom Substrate
Using a hammer and nail, puncture four holes in the lids of the shoulderless half-pint glass jars. Wipe down the lids and the jars with alcohol. They are now ready to be filled with substrate.
Mix together 2/3 cup vermiculite and 1/4 cup distilled water in a bowl. Allow the vermiculite to absorb as much water as it can.
Then mix in 1/4 cup brown rice flour for every jar you will use. If you are using all 12 jars, you will use a total of 3 cups of brown rice flour.
Make sure your ingredients are evenly mixed with no water left in your mixing bowl to have a good base for your mushrooms to grow in.
Fill your jars until half an inch from the top rim. Press down lightly so it’s not packed too tightly. Top off the top half inch with a layer of dry vermiculite.
Close the jars tightly and cover with tin foil. Make sure the edges are sealed to prepare them for steam sterilization.
Place a small towel inside your cooking pot to cover the bottom and place the foil-sealed jars on top. Fill the pot with enough water to halfway up the sides. Cover and place over a stove to slow-boil with a lid for 60-90 minutes.
When the steaming process is finished. Leave the jars in the pot and allow to cool back to room temperature. When they are at room temperature, they are ready for inoculation.
- Colonizing Your Jars with Magic Mushroom Spores
Prepare your air box by sterilizing a glove box with alchohol. This is optional but prevents contamination during inoculation.
Always wear a new pair of latex gloves during each step of the mushroom growing process.
Sterilize your mushroom spore syringe with a lighter or torch until it is red hot. Let it cool and wipe with alcohol.
Pull back the plunger of your spore syringes and shake to evenly distribute the spores suspended in the liquid.
Remove the foil from a jar. Make sure you don’t let the needle of your spore syringe touch anything, including the lid of the jar or the substrate. Carefully insert the syringe through one of the holes as far as it will go.
Inject around 1/4 cc of the psylocybin spore solution into the side of the glass jar – not directly onto the substrate. Wipe the needle with alcohol and repeat for each of the four holes of each jar.
Cover the holes with micropore tape.
Leave the jars in a clean, dark area, away from direct sunlight, where they can remain undisturbed. The space should be cooler than room temperature.
In 7-14 days, you should observe a fluffy, white substance appearing at your innoculation sites. This is the mycelium which contains psilocybin.
At this point, if the mycelium begins to turn into colours other than white or starts to emit a strange odour, dispose of the jar without opening it. Some contaminants may be deadly to humans so it’s best to err on the side of caution as a beginner.
After around 3-4 weeks, at least six of your 12 jars should have a successful colony of mycelium cakes. Wait at least seven more days to let it strengthen its hold in the substrate before moving on the the next step.
- Transferring into the Growing Chamber
 While you wait for the mycelium to colonize the jars, you can make your grow chamber.
Drill 1/4 inch holes all over the lid, sides, and base of a plastic storage box. The holes should be around 2 inches apart.
Place a wooden block on the outside of the box and drill from the inside to out to prevent the plastic from cracking.
Place the box over something stable to hold it up and allow airflow all around. You may also place trays underneath to protect the ground from moisture leaks.
Soak Perlite under tap water and place a layer over the base of the chamber around 4-5 inches deep.
When you’re ready to transfer the mycelium cakes into the growing chamber, prepare a surface to work on by disinfecting it with alcohol. Wear your latex gloves when handling the mycelium cakes.
Open each jar and remove the dry layer of vermiculite from the top. Carefully tap out the white mycelium cakes from the jar and onto your disinfected surface. Be careful not to damage the cakes so that they remain intact.
Fill your cooking pot with tepid water and submerge the cakes just below the surface. Leave them to rehydrate for upto 24 hours.
When they are rehydrated, carefully remove them from the pot and back onto your disinfected surface.
Fill a mixing bowl with dry vermiculite and roll the cakes in this to fully coat them. This will help to keep in the moisture.
Cut pieces of tin foil for the bottom of each cake so that they will not touch the Perlite when transferred into the growing chamber. Space the tin foil evenly in the chamber and place the cakes on top of each piece.
Gently mist the chamber with a spray bottle with distilled water. Fan the chamber with the lid before closing.
- Optimizing Growth and Fruiting Conditions
While waiting for the shrooms to fruit and grow, you want to observe and keep conditions in the growing chamber as close to nature as possible in an indoor setting.
Some people like using lights to mimic a 12-hour night and day cycle, but mycelium really only need minimal indirect light to know where open air is and fruit the shrooms in that direction.
Mist the chamber four times daily with the spray bottle. Only a light misting is needed. Do not soak the mycelium cakes with too much water.
Fan the growing chamber with the lid six times daily, but most especially after misting, to increase airflow.
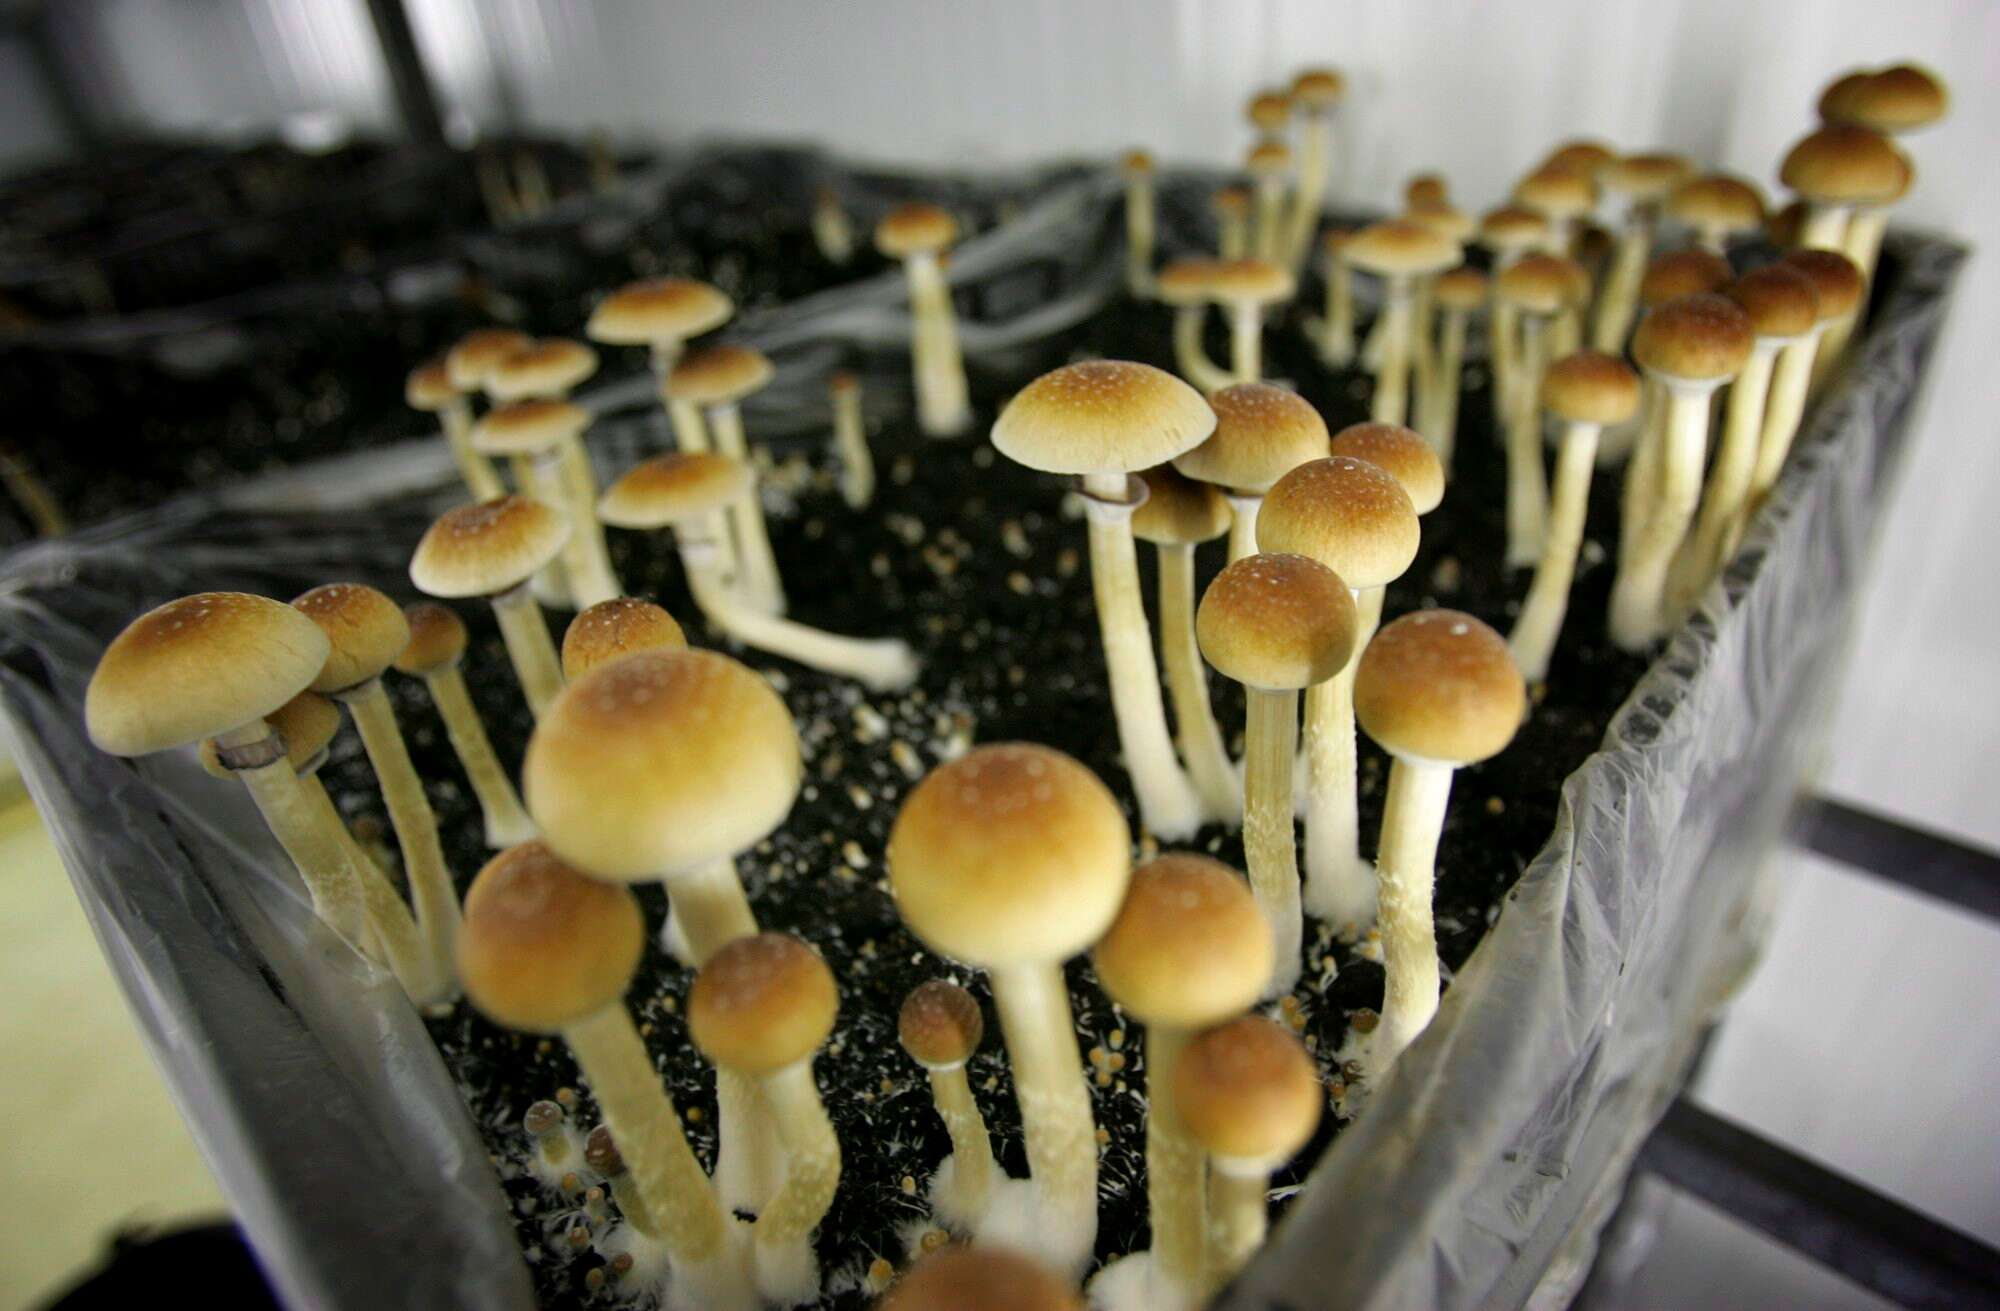
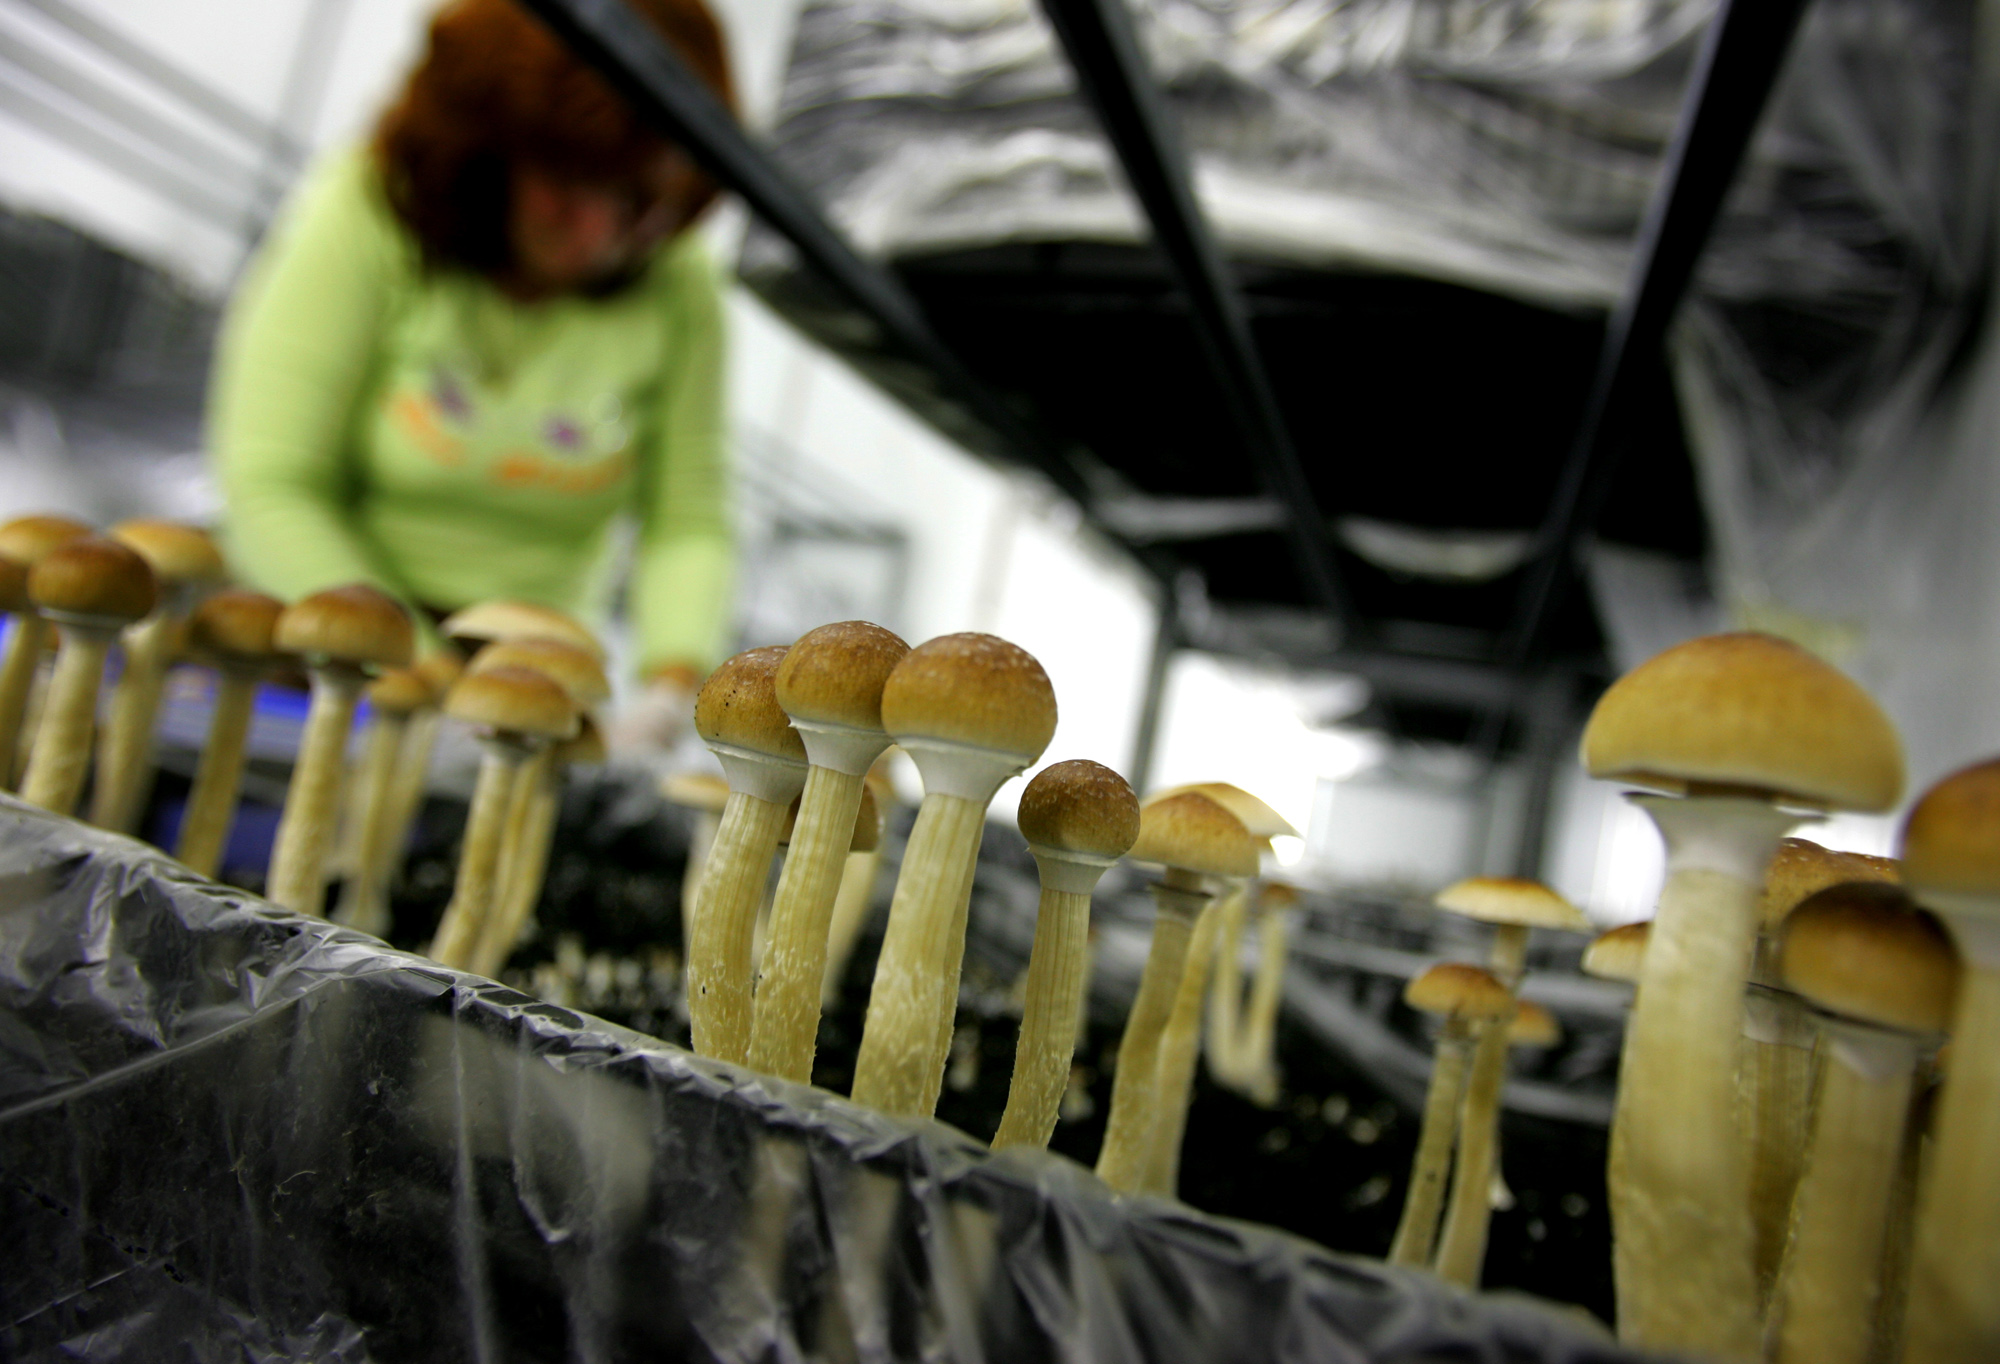
The magic mushroom fruits will first appear as little bumps then pins. They will be ready to harvest in around 10-14 days.
- Harvest Time
Don’t wait too long to harvest when you’re growing magic mushrooms because they lose psilocybin potency as they mature.
But if you want to create your own psilocybin spore syringes, you will have to allow a few of the shrooms grow to maturity to create a spore print.
For those you want to harvest wait until they have light cone shaped caps and covered gills. Pluck them as close to the cake as possible right before the veil breaks.
Drying is the best way to preserve your harvest to keep them potent for as long as possible. Ensure that no moisture is left in the dried shrooms and freeze them to keep them good for as long as six months or more.
The cakes can still be used for one or two more batches. Simply repeat the dunking in water process and place them back into the growth chamber – no need to re-roll them in vermiculite.
Warning Signs When Things Go Wrong
Throughout the entire process, it’s important to watch out for contaminants. As already mentioned, as a beginner, it’s better to err on the side of caution and dispose of any jars or cakes that begin to show signs of going bad.
This can either be strange colours appearing on the mycelium or substrate or strange odours.
Do not open the jars when disposing of the bad colonies. Also wear gloves and a surgical mask if you need to remove and dispose of bad cakes from the growth chamber.
Conclusion
Growing psychedelic mushrooms is a fascinating and educational process that can help you connect to the spirit of the magic mushroom as you partake in it for healing or conscious spiritual journeying.
But you don’t have to go through the whole process of sterilizing and preparing all the mushroom growing supplies to have your regular dose of psilocybin.
Apply for microdosing right now and we’ll can help put you in contact with trusted, reliable, third-part psilocybin suppliers who will help asses your situation and needs to provide the best quality psilocybin for microdosing.